
Hey Y'all!!!
Happy Saturday and hope all is well!! Today is my Level 2 Final challenge(SO SO STOKED!!!) and I want to share with y'all what I have been up to!! My challenge was to create 4 Masculine Cards(Birthday, Love/Thinking of You, Anniversary and Encouragement) and a Altered/Upcycled Project!! I also had to use 3 components from the Altenew classes in my projects!!
Card One(Love/Thinking of You)


Altenew Products: Teachers Rule, Painted Grid Washi,Reflections Paper, Misty Morning 6 Mini Cube Set
Component: Layering Stamps (Layer one in lighter color and layer 2 in darker color)
Directions on how to create this fun Card!!

1. Stamp images(using Altenew, IMAGINE Crafts and Ranger inks) onto a piece of white cardstock.

2. Trim images using scissors.

3. Stamp sentiment with black ink(IMAGINE Crafts).

4. Add splatter(IMAGINE Crafts) onto image panel.

5. Affix patterned paper onto image panel. Adhere images onto image panel.

6. Add washi and adhere image panel onto card. Adhere image panel onto card front.
Card Two(Birthday)


Altenew Products: Misty Morning 6 Mini Cube Set, Sketchy Cities Abroad Stamp Set, Art Deco Stencil, Morning Glory Pallette Washi Tape
Component: Masking with Stencils and Stamps
Directions on how to create this super retro card!

1. Stamp image onto white cardstock.

2. Heat emboss image using clear embossing powder.

3. Stamp image again but onto a piece of computer paper. You will cut this out and use as a mask.

4. Add mask onto image panel and stencil design using stencil, ink and ink blender tool.

5. Add washi tape onto image panel.

6. Stamp and heat emboss sentiment onto a piece of green cardstock. Adhere to image panel and adhere image panel onto card front.
Card Three(Encouragement)


Component: Color Your Day(Using the Color Wheel/Primary Colors aka Triadic Harmony)
Directions on how to make this card!

1. Stamp image with black ink.

2. Heat emboss image with Black Embossing Powder.

3. Watercolor image with Karin Marker and water.

4. Die cut image.

5. Die cut patterned paper. Stamp sentiment.

6. Heat emboss sentiment.

7. Adhere feather onto patterned paper panel and affix washi tape.

8. Die cut another panel.

9. Adhere everything onto image panel using adhesive and foam adhesive. Adhere image panel onto card front.
Card Four(Anniversary)
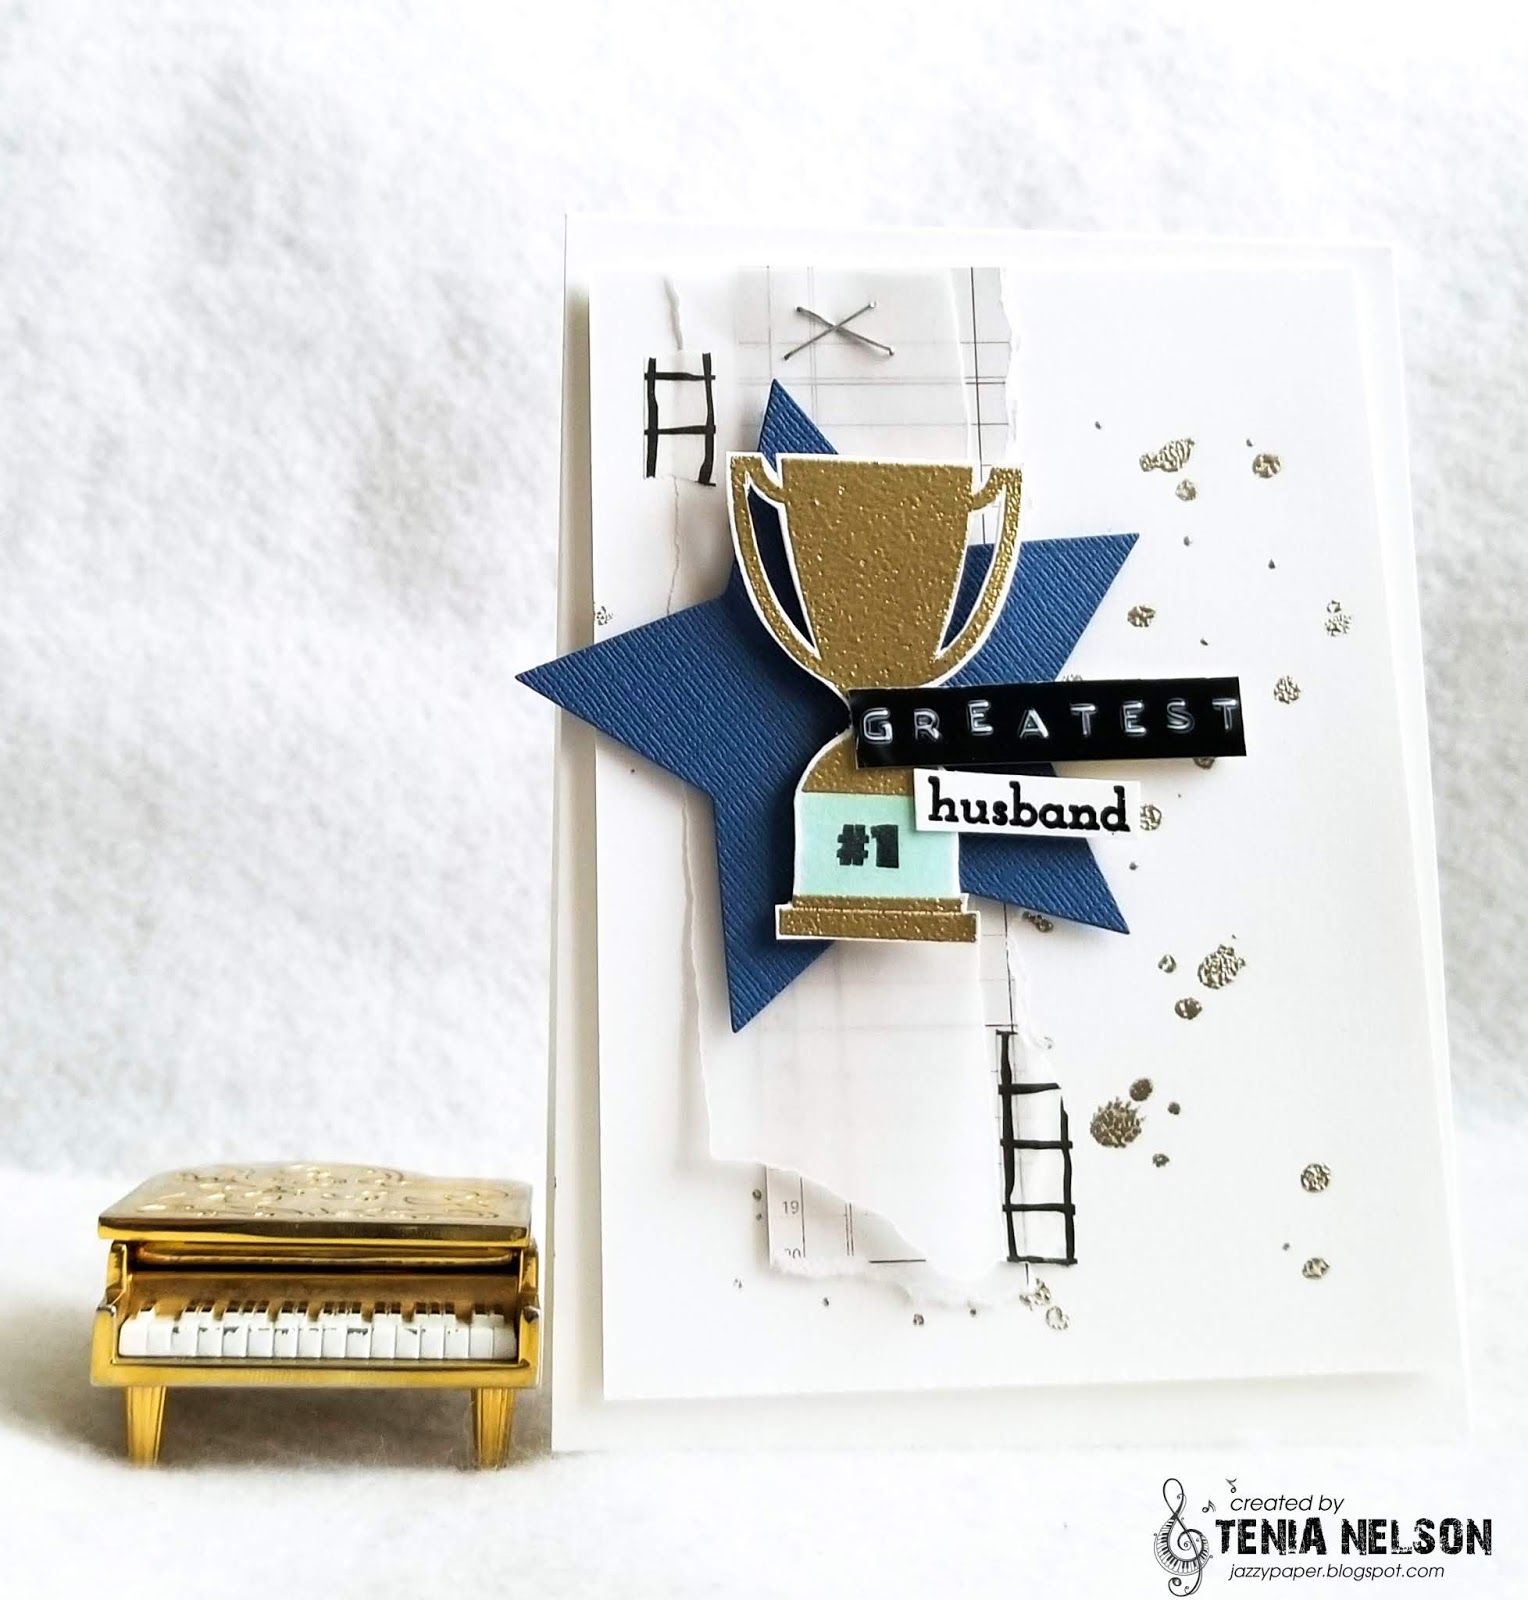

Component: Heat Embossing and heat embossing with Water
Directions on how to create this super clever Anniversary Card!!


1. Splatter water onto image panel. Add Gold Embossing Powder and heat emboss.

2. Stamp and heat emboss trophy image(with Gold Embossing Powder) onto a piece of white cardstock.

3. Stamp label with Dew Drop ink.

4. Stamp #1 onto trophy with black ink.

5. Cut out image using scissors.

6. Die cut star using a die cut machine.

7. Stamp sentiments with black ink onto a piece of white cardstock.

8. Heat emboss sentiments with black embossing powder.(I only used the "husband" sentiment)

9. Create "GREATEST" sentiment with Dymo Label Maker.

10. Staple vellum and patterned paper onto image panel.

11. Put together card and adhere to card front.
Altered/Upcycled Project


Altenew Products: Painted Grid Washi Tape, Misty Morning 6 Mini Cube Set, On The Plus Side Stencil
I had this book by Faber-Castell in my studio for the LONGEST time and I needed to do some thing with it.....so there you have it!! Finally.....right??!! Also I used a piece of used cardboard for the tab on the upper right hand corner of the altered book!
Directions on how to create this super duper CAS Altered Book!

1. I used this Faber-Castell book to alter my project!!

2. Stencil the cover page of book using On The Plus Side stencil, Just Green ink and ink blender tool.

3. Adhere stickers(Michaels) onto white cardstock and cut out.

4. Affix washi onto the cover of book.

5. Die cut a piece of used cardboard and adhere to cover of book.

6. Create "For You" sentiment with Dymo Label Maker. Affix onto cover of book.
Thanks so much for stopping by and have a great day!!
-t
2 comments:
WOWZERS!!! As always your cards are ONE OF A KIND!! All of them are absolutely brilliant including the last project!
Thank you for entering your work to the AECP assignment gallery. Top job!
OMG..Awesome creative and unique cards and book, Tenia. I loved all your photos sharing all your steps and products. I have always loved your unique layered CAS card designs. You will be an awesome teacher using paper designs. TFS and stay safe and Creative, dear friend. Love and Hugs...Nancy
Post a Comment